Add a Tree
Add an Existing Tree
Found an existing tree not already in your inventory? Great find! – lets get it registered.
• First, go to your Inspections Map and navigate to the location using either the address search bar, zoom or geolocation tool.
• Select the button in the lower right corner of the screen and select Add a Tree.
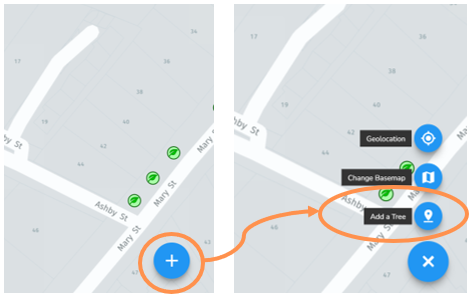
• Click where the tree is on the map.
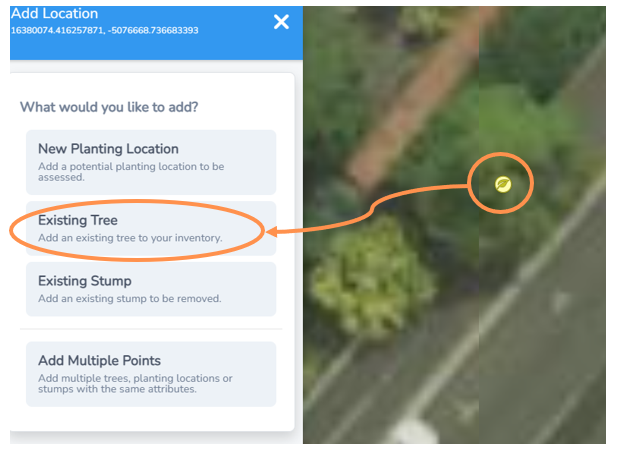
• A pale yellow leaf marker will appear and the left side menu will expand.
• Select Existing Tree from the menu
HINT: First change your basemap to satellite layer to make marking existing tree locations easier. You can do this on the lower right button with the Change Basemap function.
Dropped your marker in the wrong spot?
• To move the location, simply click, hold and drag the marker to the correct spot.
Add Tree Information
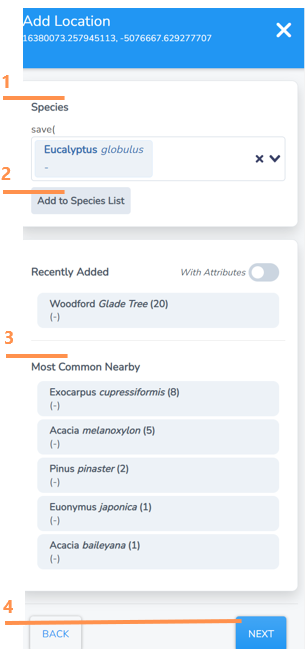
Next you will be presented with a list of attributes you can allocate to your tree.
To select the species of your tree you have a few options:
1. Search bar function, simply start typing and select from drop down options
2. Add a new species if you can't find it in the existing search bar list
3. Check if the recently added or most common nearby section has your tree as a convenient function.
4. Once selected, click next
HINT: The search bar includes genus level options (eg Eucalyptus sp.) which can be useful if you are unsure of the exact species.
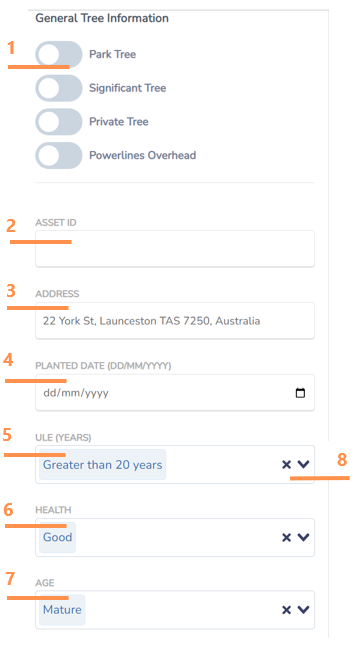
General Tree Information
Enter as many known attributes as you can.
- Click to mark if a tree is in a park, significant, on private land and/or has powerlines overhead. You can select as many as applicable. NOTE: To save you time the default is street tree so you don’t have to specify that.
- Enter an asset ID if applicable to you (many Councils use unique ID asset numbers in this section that cross reference to a financial asset database).
- The closest street address will automatically populate here, but you can overwrite it if you like.
- Planted date if known.
- Useful Life Expectancy (ULE). The dropdown box will give you date range options.
- Select current health from dropdown box options.
- Select current tree age from dropdown box options.
-
At any point you can select the “x” option to leave a category empty, but the system works best with as many fields complete as possible.
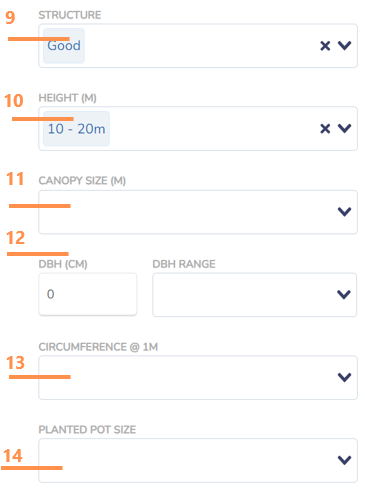
Tree Size
Enter as many known attributes as you can.
9. Select the tree structure from dropdown box options.
10. Select the tree height range from the dropdown box options.
11. Select the canopy size from the dropdown box options.
12. Enter the Diameter at Breast Height (DBH) either directly in cm if you know the precise measurement or using the DBH Range drop downbox with options. Using the exact DBH measurement is always best to get more accurate ecosystem service values.
13. An alternative to DBH is to include the trunk circumference at 1m above ground level. You can select the closest range from the dropdown box options.
14. Select planted pot size if known from the drop down box options.
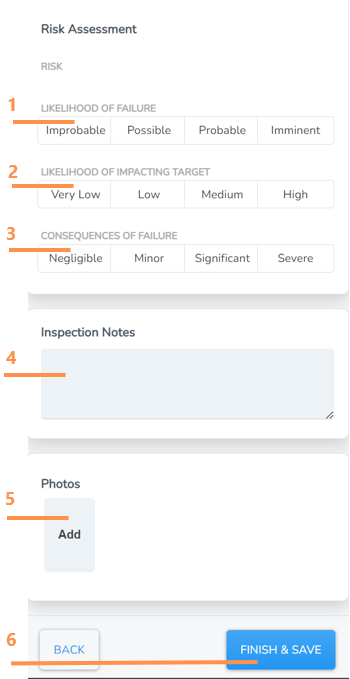
Risk Assessment, Inspection Notes and Adding Photos
Enter as many known attributes as you can.
1. Select the likelihood of failure risk by clicking on one of the options.
2. Select the likelihood of impacting target risk by clicking on one of the options.
3. Select the consequences of failure risk by clicking on one of the options.
4. Type in any inspection notes if applicable.
5. Click “Add” and you will be taken to a browse screen to select and import a photo from your computer or device.
6. Select Finish & Save to close the form and save the tree attributes to your added tree.
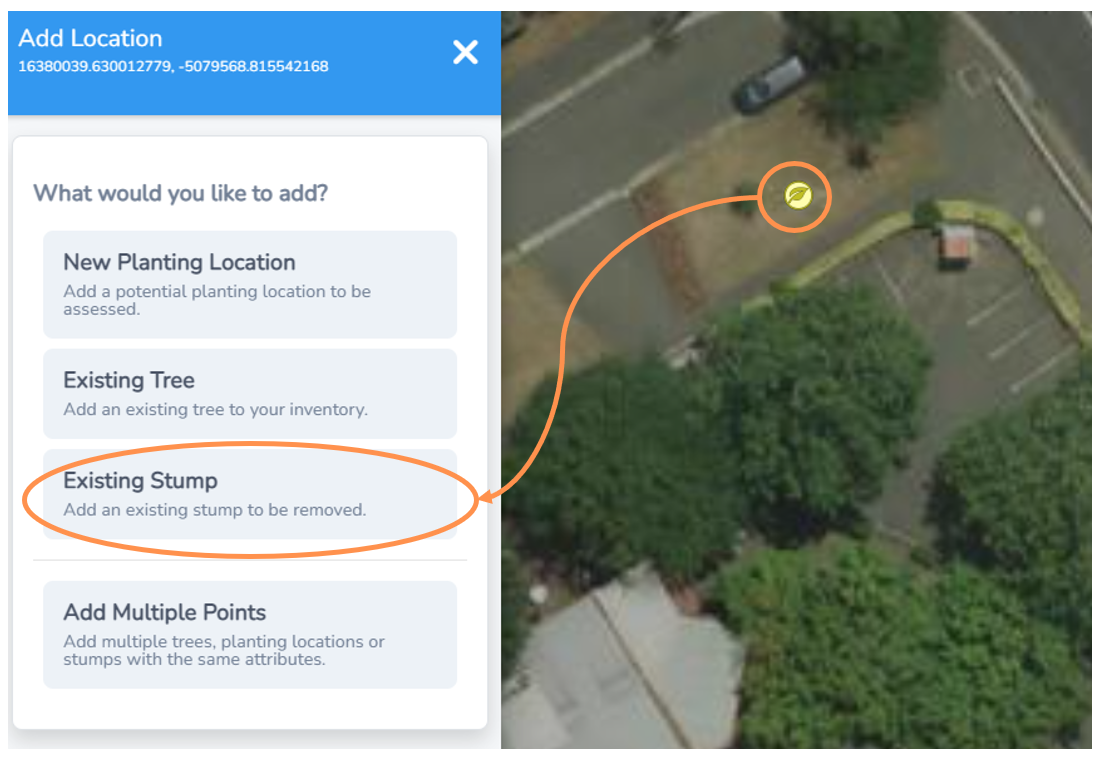
Add an Existing Stump
Found an existing stump not already in your inventory? Register it so you have a record and it will be easier if you want to set up a task later to have it removed.
• First, go to your Inspections Map and navigate to the location using either the address search bar, zoom or geolocation tool.
• Select the button in the lower right corner of the screen and select Add a Tree.
• Click where the stump is on the map.
• A pale yellow leaf marker will appear and the left side menu will expand.
• Select Existing stump from the menu
HINT: Change your basemap to satellite layer to make marking existing stump locations easier. You can do this on the lower right button with the Change Basemap function
Add Stump Information
1. Select the stump size by clicking on one of the drop down box options.
2. Click “Add” and you will be taken to a browse screen to select and import a photo from your computer or device.
3. Select Save to close the form and save your stump location.
NOTE: Both stump size and adding a photo are optional, but we recommend including them to make scoping future removal works easier.
