Add a Planting Location
Found a new planting location? Tree-mendous, lets register it so it can eventually get planted.
HINT: You can register a potential planting location and request it be assessed. You don't have to be certain or fill in all the details at once.
• First, go to your Inspections Map and navigate to the location using either the address search bar, zoom or geolocation tool.
• Select the button in the lower right corner of the screen and select Add a Tree.
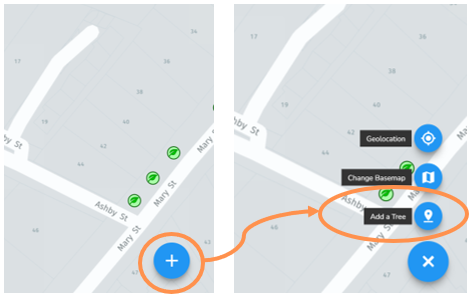
• Click where the new planting spot is on the map.
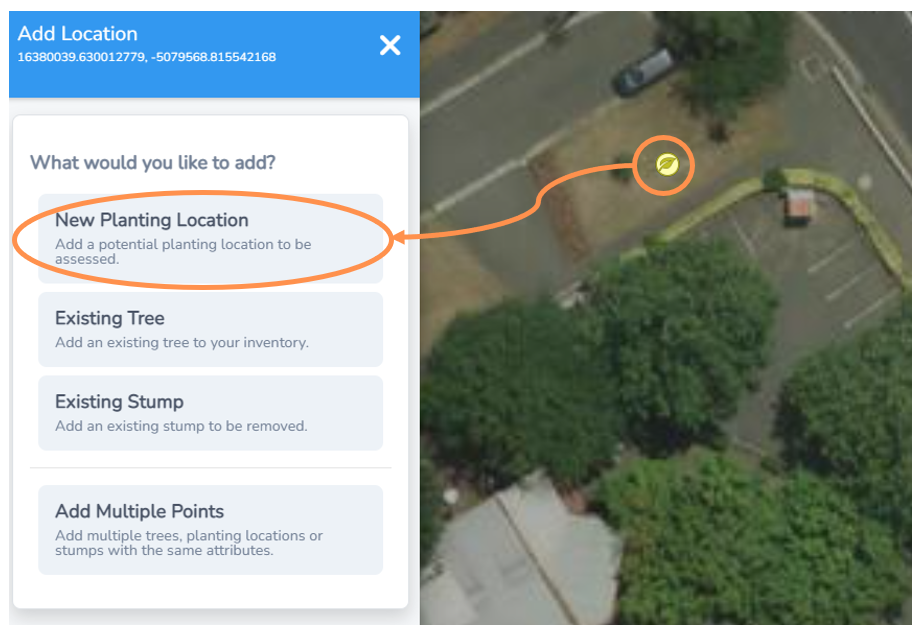
• A pale yellow leaf marker will appear and the left side menu will expand.
• Select New Planting Location from the menu
HINT: Change your basemap to satellite layer to make marking new tree locations easier. You can do this on the lower right button with the Change Basemap function.
Planting Location Information
Next you will be presented with options of attributes you can allocate to your planting location. You can use the back buttons at any time to change your selections.
NOTE: All of these attributes are optional, but we recommend entering as many as possible to help with planning and set any future tree up for success.
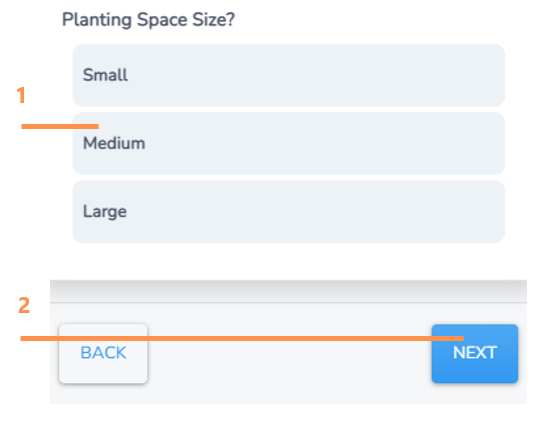
1. Select the planting space size from the options provided.
2. Click Next.
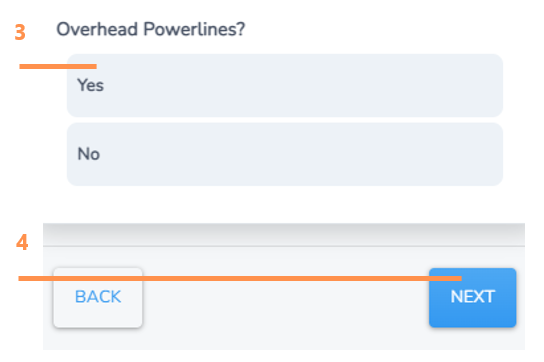
3. Select if there are overhead powerlines above the planting space
4. Click Next.
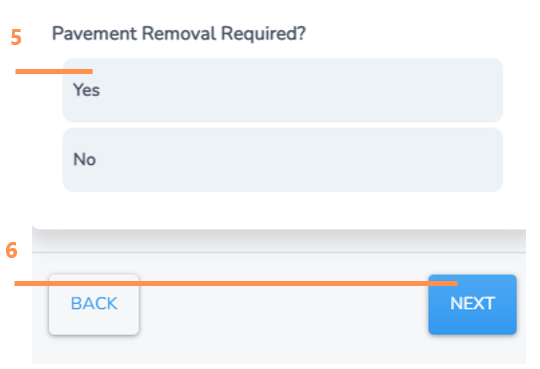
5. Select if there is pavement removal required (or other hard surface).
6. Click Next.
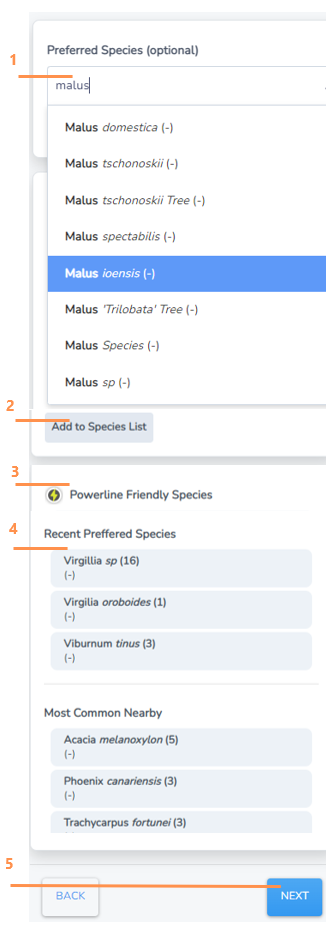
Next you will have the option to allocate a preferred tree species for this future tree location space.
NOTE: Like the name suggests, preferred species on a planting location is not fixed, so if you have an idea you can nominate is a recommendation.
To select a preferred species for your planting location you have a few options:
1. Search bar function, simply start typing and select from drop down options
HINT: The search bar includes genus level options (eg Eucalyptus sp.) which can be useful if you are unsure of the exact species.
2. Add a new species is there in case you propose a new variety not already listed or;
3. If you selected that the site has overhead powerlines, this section will automatically suggest powerline friendly species (if you have these in your background species lists).
4. Check the recent or most common nearby options as a convenient function that can save you time.
5. Once selected, or if leaving blank, click next
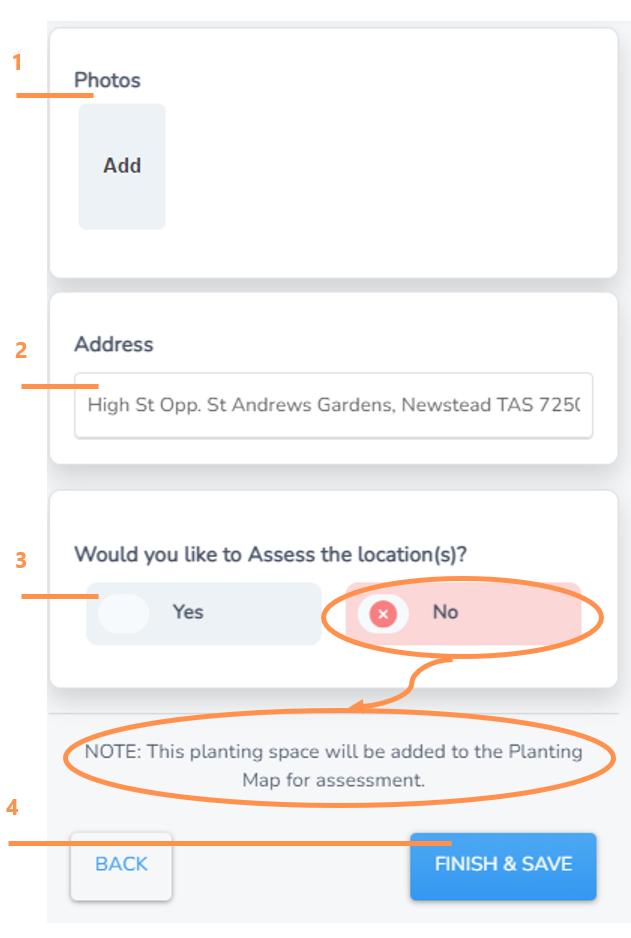
Add Location Information
1. Click “Add” and you will be taken to a browse screen to select and import photo(s) from your computer or device.
HINT: We recommend a few including from a distance (eg that would take photo of fully grown tree if it was already there), close up of the ground and perhaps of the adjacent area/street for context.
2. The closest address will automatically populate here, but you can overwrite it if you like.
3. Select if you wish to assess the location.
a. If you select no, Forestree will automatically create it as a task to be assessed on the planting map
b. If you select yes, skip to step 5 Assess Location.
4. Select Finish & Save to close the form and save your new tree location.
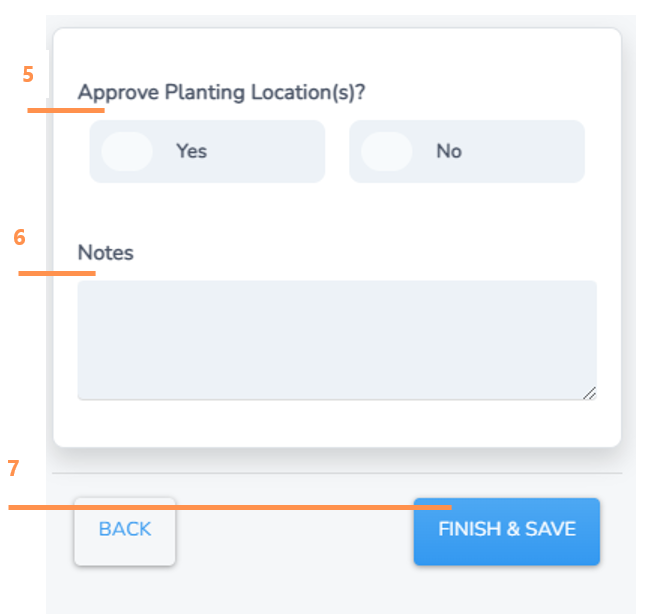
Assess Location
If you have the authority to do so, you can assess location at the time of inputting the new tree location.
5. Approve the new tree planting location by selecting "yes".
6. Type in any notes if applicable.
7. Select Finish & Save to close the form and save the new approved planting location.
Add Multiple Points
Did you know you can save entry data time by entering multiple points?
This works for adding multiple existing trees, stumps or new planting locations if they are in the same vicinity and the same variety.
• First, go to your Inspections Map and navigate to the location using either the address search bar, zoom or geolocation tool.
• Select the button in the lower right corner of the screen and select Add a Tree.
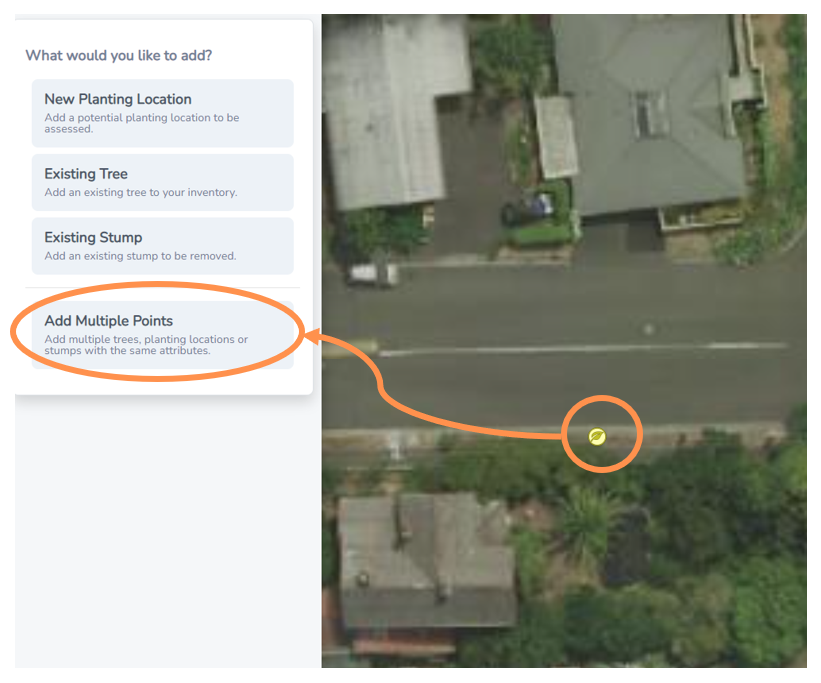
• Click where the first new spot is on the map.
• A pale yellow leaf marker will appear (only one to start with) and the left side menu will expand.
• Select Add Multiple Points from the menu
Add Additional Points
• A new menu bar will appear at the bottom of the map.
• Click on the map to add new marker icons where you would like additional points. You can click and drag on any of your new points to reposition them.
• The number in the lower menu bar will keep a tally of your new points.
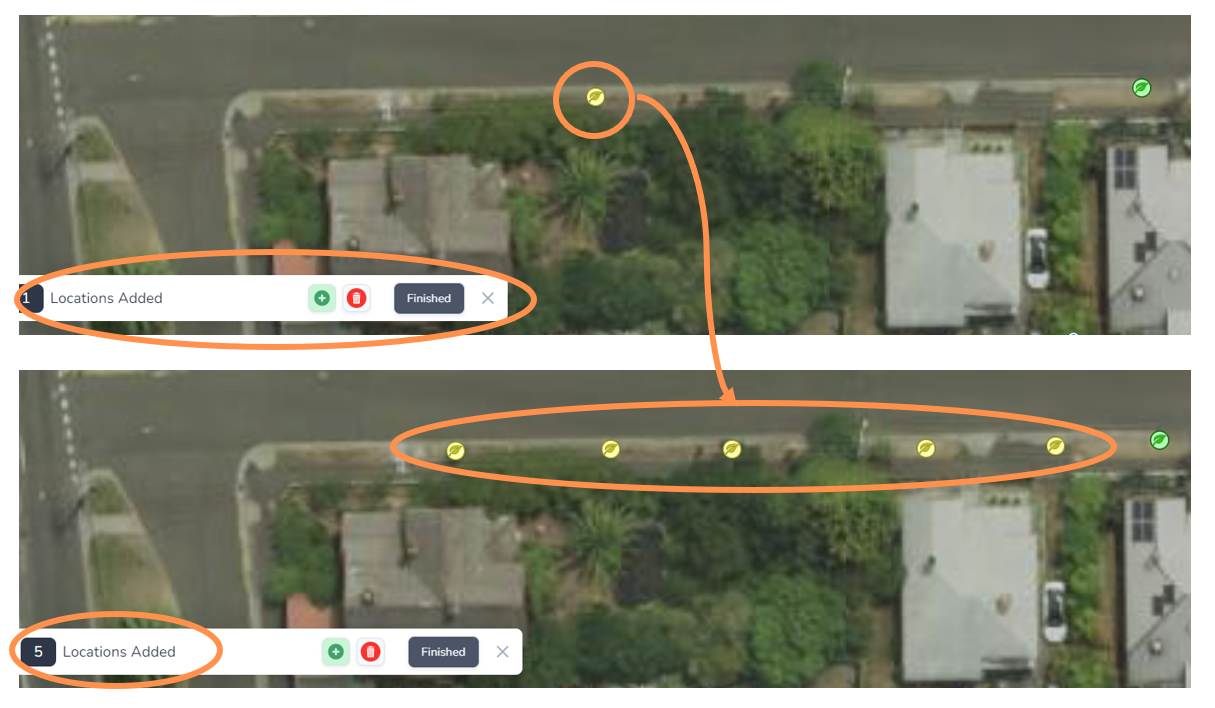
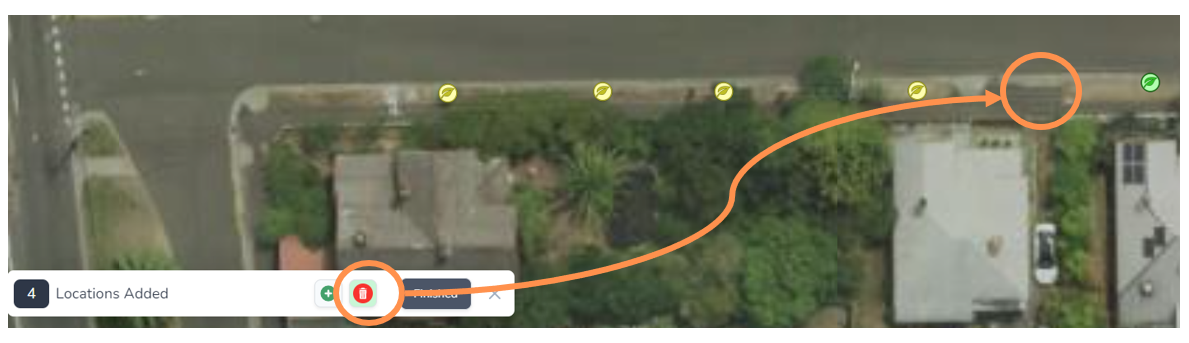
• Select the red rubbish bin button if you want to delete any points
• Select the green plus button if you want to continue adding points.
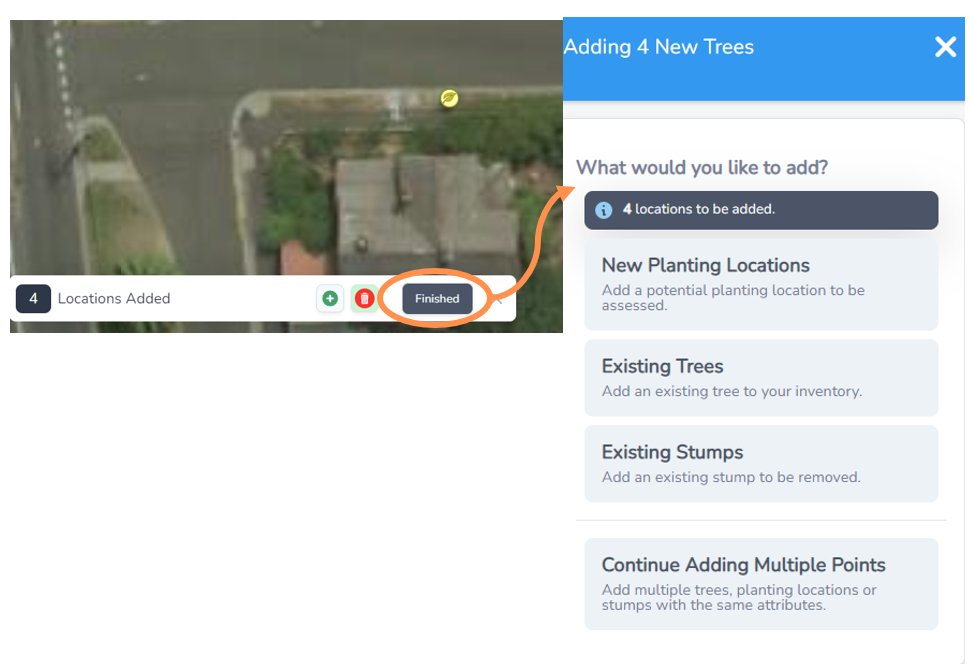
In the example below a point was deleted which had been placed over a driveway in the image above. Note the menu bar tally now counts 4 locations.
Bulk Add Data to Multiple Points
• When you have added all your multiple points, select Finished.
• A menu will appear with heading indicating how many multiple points will be added and you can select from one of the options.
• Once you make your selection from New Planting Locations, Existing trees or Existing Stumps you will flow through to that process, however any attributes will be bulk added to all your tree points at once.
• You can follow the guides on how to add new trees or planting locations as the steps are the same.
• You also have the option to continue adding multiple points if you want to go back into the map mode where you can add or remove your new leaf icon markers.