Inspect a Tree
Undertake tree assessments, keep records and allocate required works in the same place.
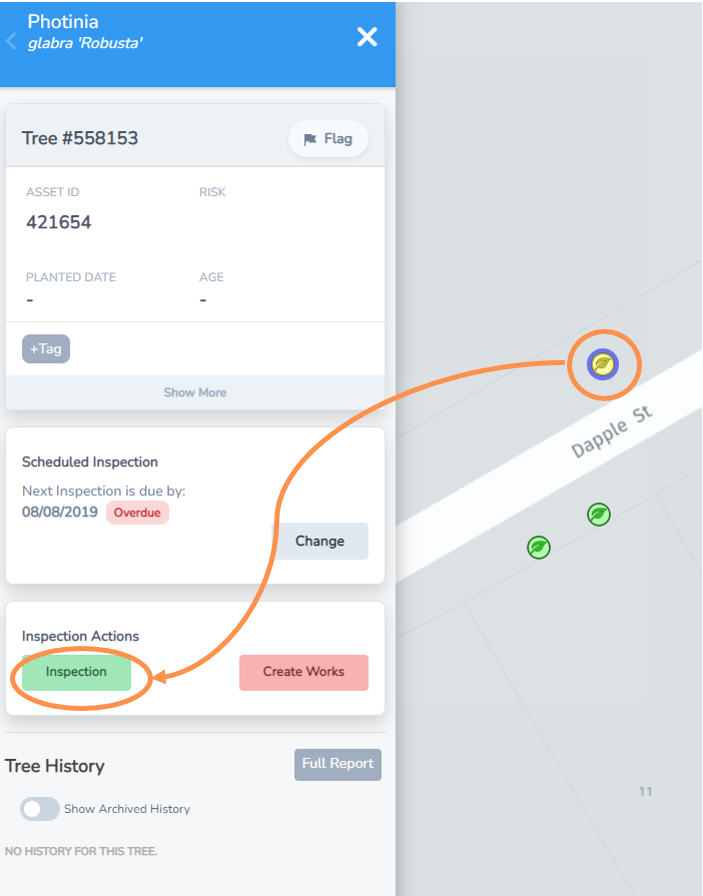
• Navigate to the tree you want to inspect from the Inspections List or the Inspections Map view.
• Select the tree leaf icon maker and the menu to the left will expand.
• Under the Inspections Actions, select the Inspection button.
Review Tree Information
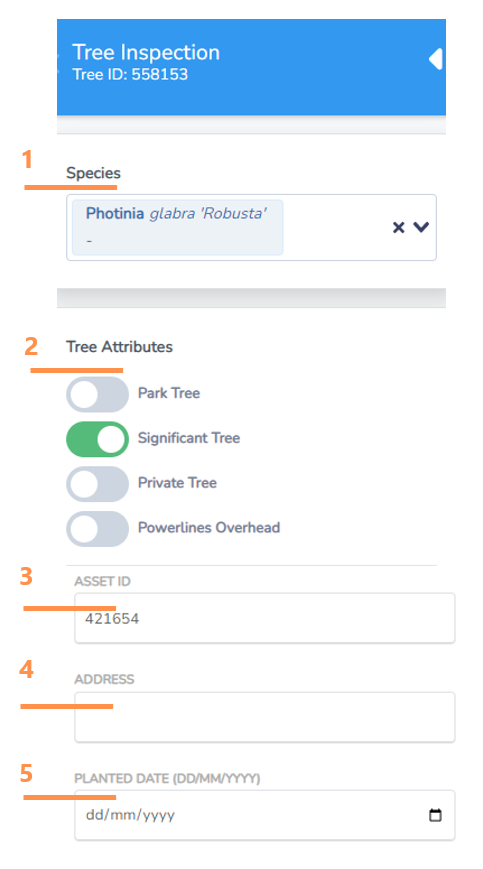
First you will be presented with the list of attributes currently allocated which you can edit.
Check the information is correct and complete any missing fields.
1. To add the species (if the field is blank) start typing at least a few letters and then use the drop down box to select.
2. Click to mark if a tree is in a park, significant, on private land and/or has powerlines overhead. You can select as many as applicable. The toggle buttons will appear green if they have been selected.
3. Enter an asset ID if applicable to you (many Councils use unique ID asset numbers in this section that cross reference to a financial asset database).
4. Review or enter the closest street address.
5. Planted date if known.
Review Tree Size and Condition
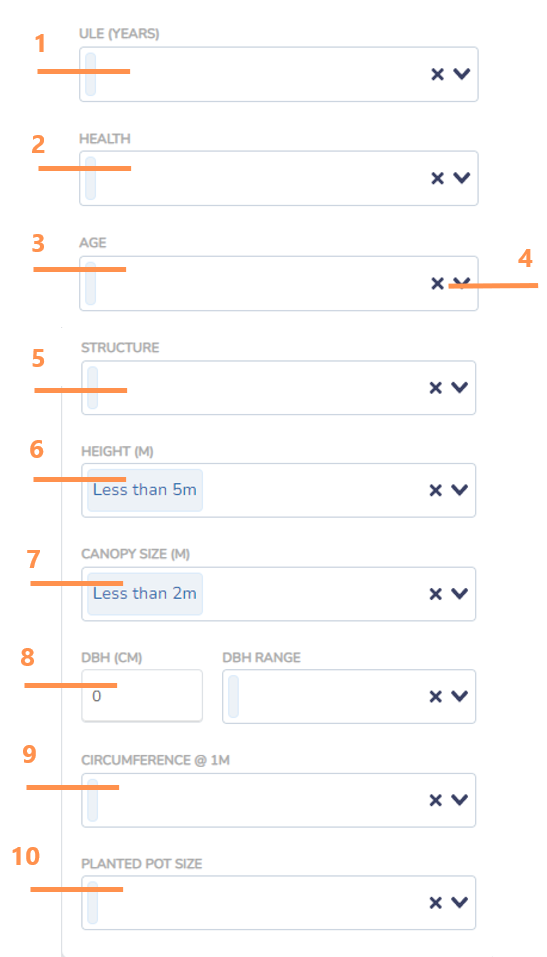
Check the information is still correct and complete any missing fields.
1. Useful Life Expectancy (ULE). The dropdown box will give you date range options of Less than 5 years, 5-10 years, 10-20 years or greater than 20 years.
2. Select current health from dropdown box options.
3. Select current tree age from dropdown box options.
4. At any point you can select the “x” option to leave a category empty, but the system really works best with as many fields complete as possible.
5. Select the tree structure from dropdown box options.
6. Select the tree height range from the dropdown box options.
7. Select the canopy size from the dropdown box options.
8. Enter the Diameter at Breast Height (DBH) either directly in cm if you know the precise measurement or using the DBH Range drop downbox with options.
9. An alternative to DBH is to include the trunk circumference at 1m above ground level. You can select the closest range from the dropdown box options.
10. Select planted pot size if known from the drop down box options.
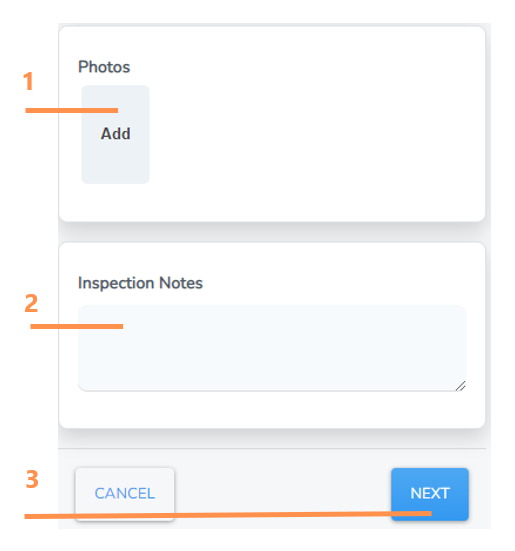
Adding Photos and Inspection Notes
1. Click “Add” and you will be taken to a browse screen to select and import a photo from your computer or device.
2. Type in any inspection notes if applicable.
3. Select Next.
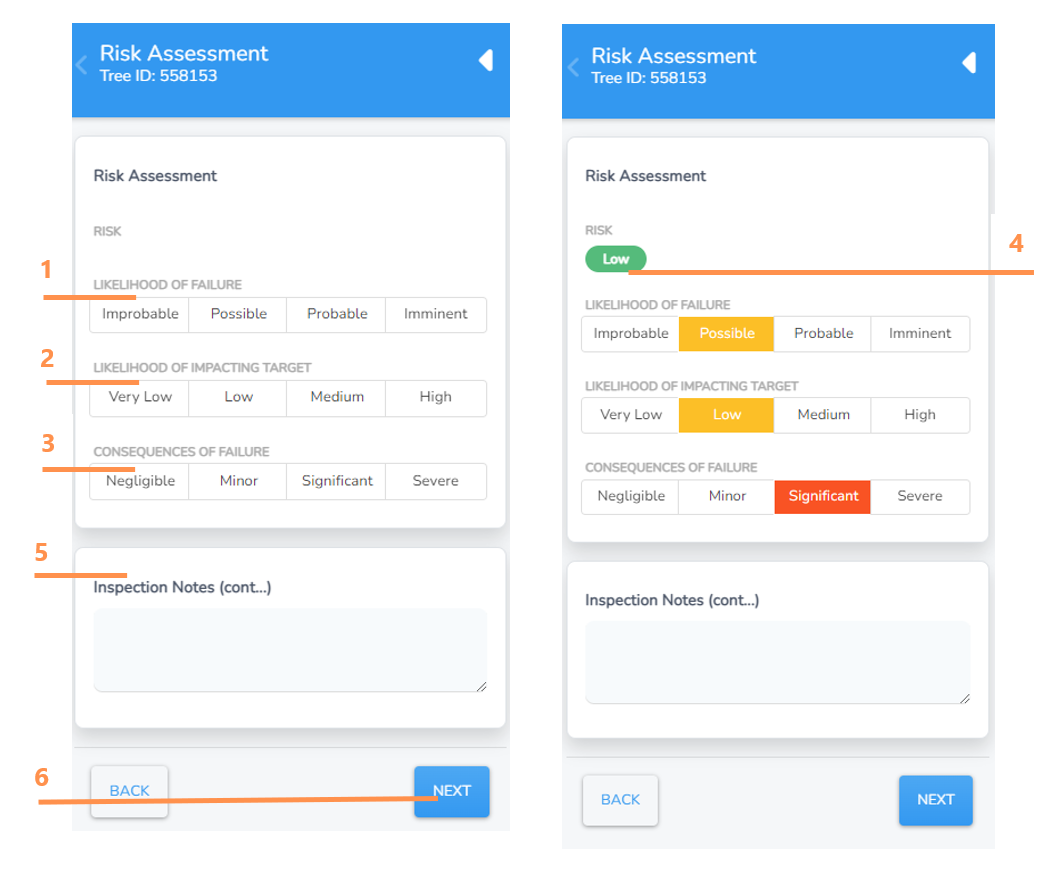
Risk Assessment
This section will either be blank or include the inputs from the last inspection
NOTE: The exact options you see may differ depending on your risk assessment settings.
Complete, review or update as needed for the:
1. likelihood of failure
2. likelihood of impacting target
3. consequences of failure
4. Once selected, the overall risk score will automatically appear, using the risk matrix approach.
5. Add any inspection notes as needed relating to risk
6. Select Next
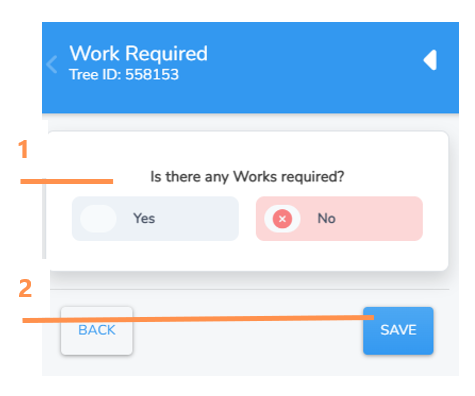
Works Required
Sometimes inspections identify works required, sometimes they don’t.
1. Indicate if there are any works required
• If No works are required, select Save.
• If Yes works are required, move to the Create Works section of this guide.