Create Works
Use this step to allocate required works for a tree asset.
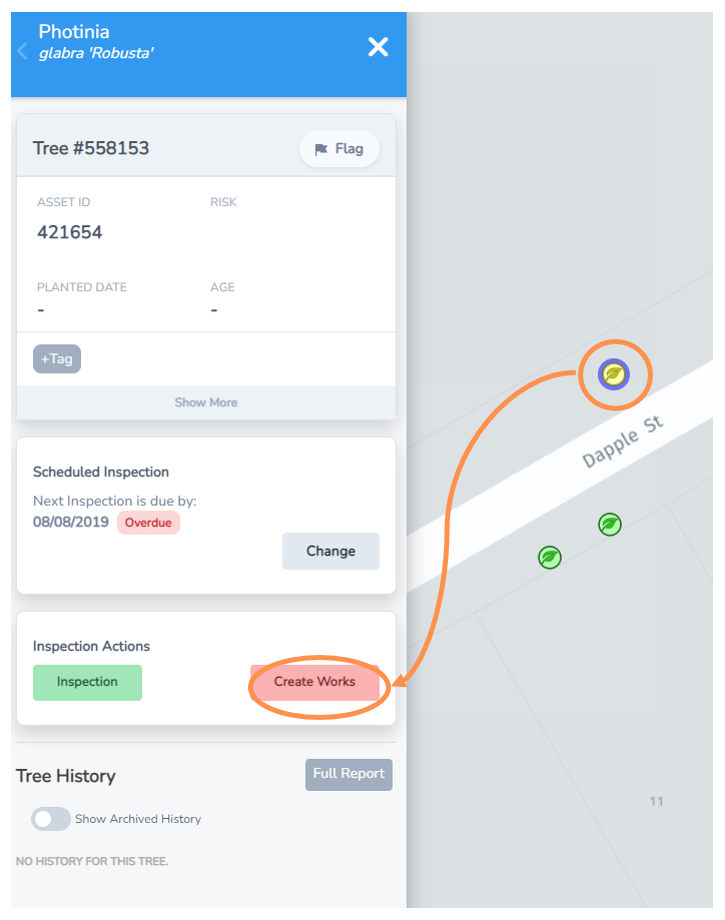
• Navigate to the tree you want to create work for from the Inspections Map view.
• Select the tree leaf icon maker and the menu to the left will expand.
• Under the Inspections Actions, select the Create Works button.
• Alternatively, create works is an option at the end of every Inspection process.
Add Type of Work(s) Required
Next you will be presented with the create works menu and wide range of standard tree works options.
• Select the appropriate work type(s) from the prune, maintain or other options.
• You can select as many as required.
• Once selected the buttons turn green with a tick mark. If you clicked one by accident, click it again and it will turn off and return to grey.
• Then select Next.

Add Detail to Works Required
Now you can assign more specific details for the work(s) required.
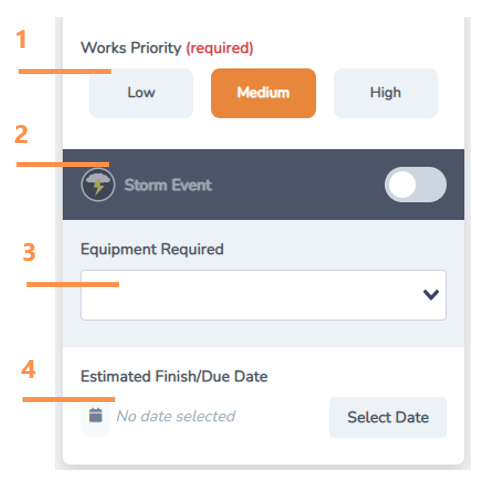
1. Mandatory field to select the priority of the works (how urgent must they be done)
2. Select this toggle button if the works required are due to a recent storm weatherevent. This can really help with reporting.
3. Option to select the equipment required from the drop down options (eg chipper, elevated work platform).
4. Select an estimated finish/due date. HINT: This is especially useful to include if you or your customer experience staff will be providing updates to customer enquiries about the works status.
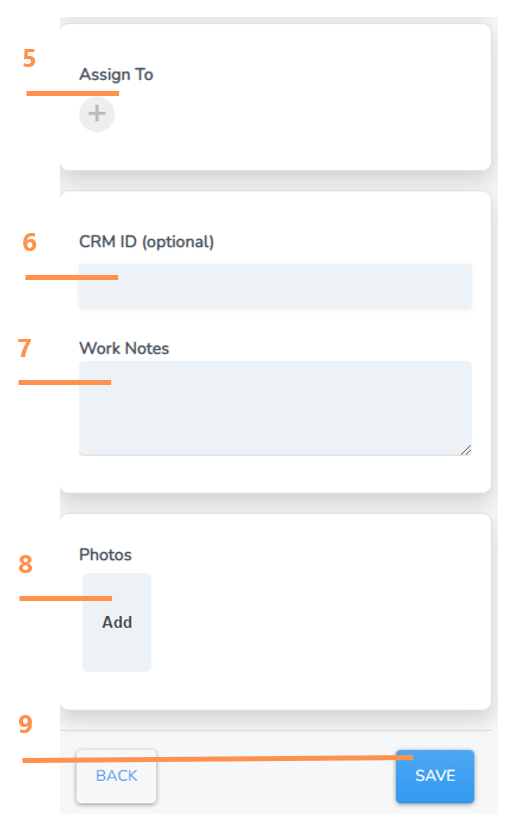
5. You can press the plus button and select a team member to assign to the works.
6. Include a CRM ID if applicable. Some Councils use a Customer Reference number as a way to track a request made by a customer through to any works completed.
7. Write any specific work notes specific to the task. HINT: Think about what information you would want to undertand the task if it was assigned to you by someone else?
8. Click “Add” and you will be taken to a browse screen to select and import a photo from your computer or device.
9. Select save. The work(s) will now be registered and added to the works list and map.