Inspections List
These lists keep track of all the flagged and scheduled inspections so you can search, filter, and prioritise.
You will find the Inspections List on the left side menu from the Main Dashboard (homepage).
Scheduled Inspections List
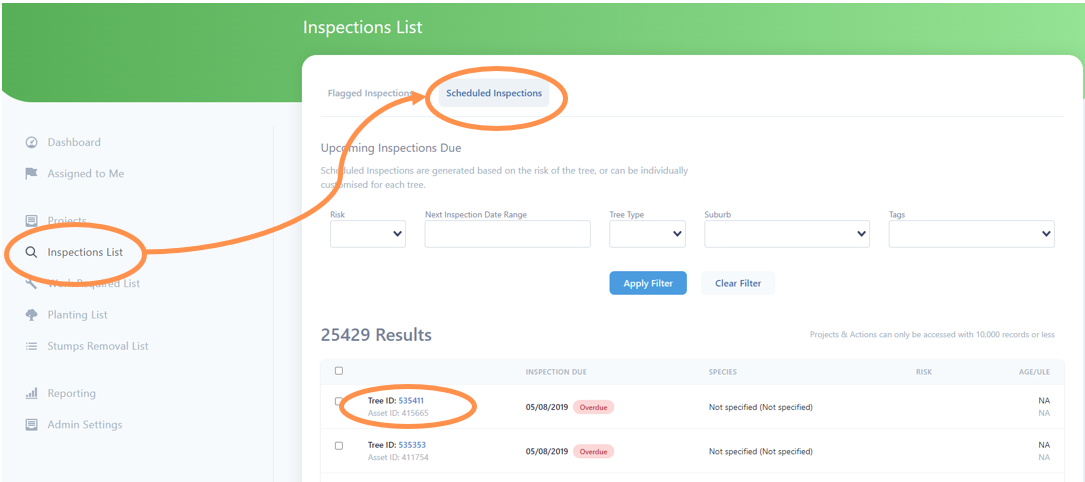
This is a list of all of your tree assets, grouped by when their routine health and condition inspection is due.
1. Navigate to this list by selecting the Scheduled Inspections tab at the top of the Inspections List page.
2. The default is for all trees to appear, in order of their inspection due date.
3. If you select a Tree ID number, you will be automatically taken the Inspections Map, zoomed down to that tree with the left menu ready so you can click through the inspect tree steps.
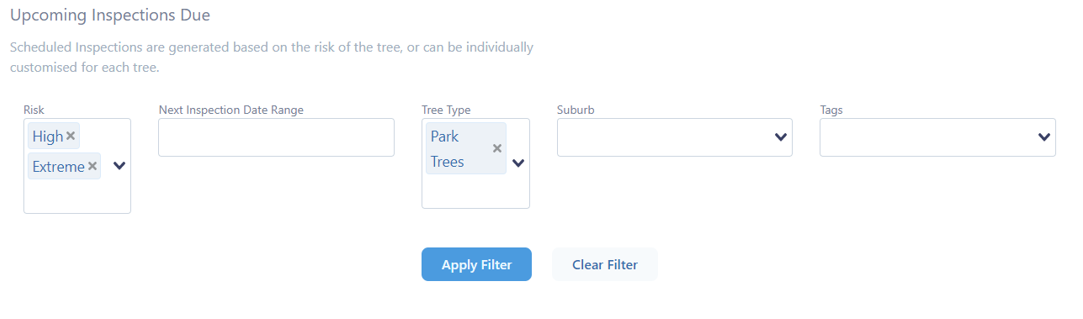
Filter the List
• You can filter the list by a range of attributes. You can filter by one or more categories.
• Risk Level. NOTE: The dropdown box options include “N/A” which is for any trees currently without a risk assessment score
• Next Inspection Date Range
• Tree type (eg park trees)
• Suburb
• Tags (if you have been using unique tags on your tree data, eg wildlife box, this function can now filter by them)
• Once happy with your filter(s), select the Apply Filter button which will then filter the list.
• Select Clear Filter button at any point will revert to the entire asset list.
In the example below the inspections list will be filtered by all High and/or Extreme Risk tree assets that are Park Trees.
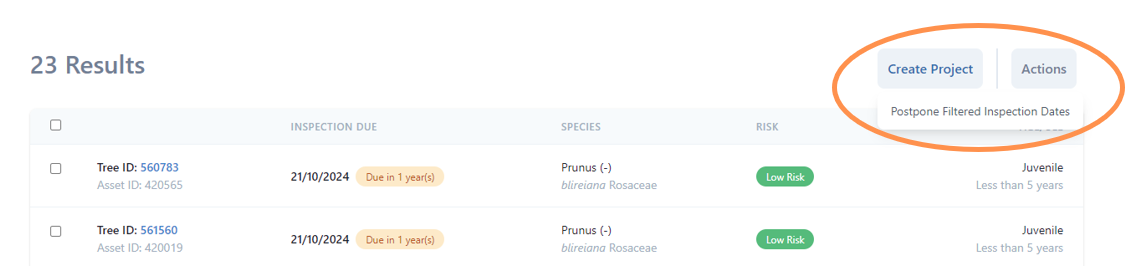
Create Projects or Actions
Once you have filtered to 10,000 trees or less, you will have new options for Create Project and Actions appear.
• Create Project will convert your filtered list into a new project. For example you can create work for priority inspections in the same suburb to task to staff or contractor. Select the Create Project button, enter a project title, save and you will move into the projects form. Refer to the Inspections Project user guide for the next steps on this project tool.
• Select Actions and you will have the option to postpone filtered inspection dates.
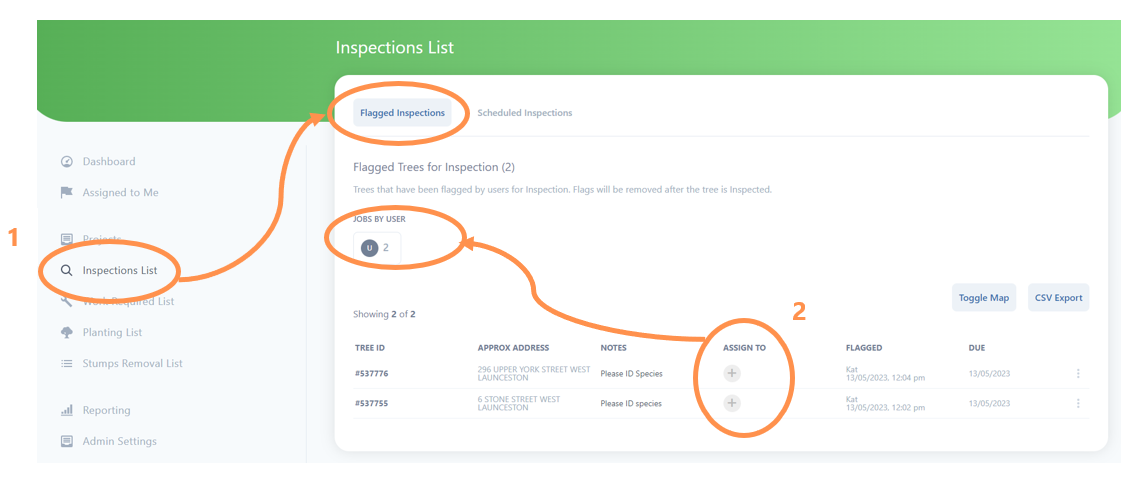
Flagged Inspections List
This is a list of any trees flagged for inspection for reasons beyond the routine inspection schedule.
1. Navigate to this list by selecting the Inspections List on the left menu. Flagged Inspections is the default opening tab for this page.
2. If the flagged trees are assigned a staff member, you will have the option to filter by user. This is a handy feature for staff to focus on their tasks. You can assign staff either when flagging the trees, or on this page by using the button under “Assign To”.
NOTE: Any unassigned inspections show as a U in a grey box.
3. If you select a Tree ID number, you will be automatically taken the Inspections Map, zoomed down to that tree with the left menu ready so you can click through the inspect tree steps.
4. You also have the option to select the three small dots on the right, this will open an option to remove (delete) the flag without completing the inspection.

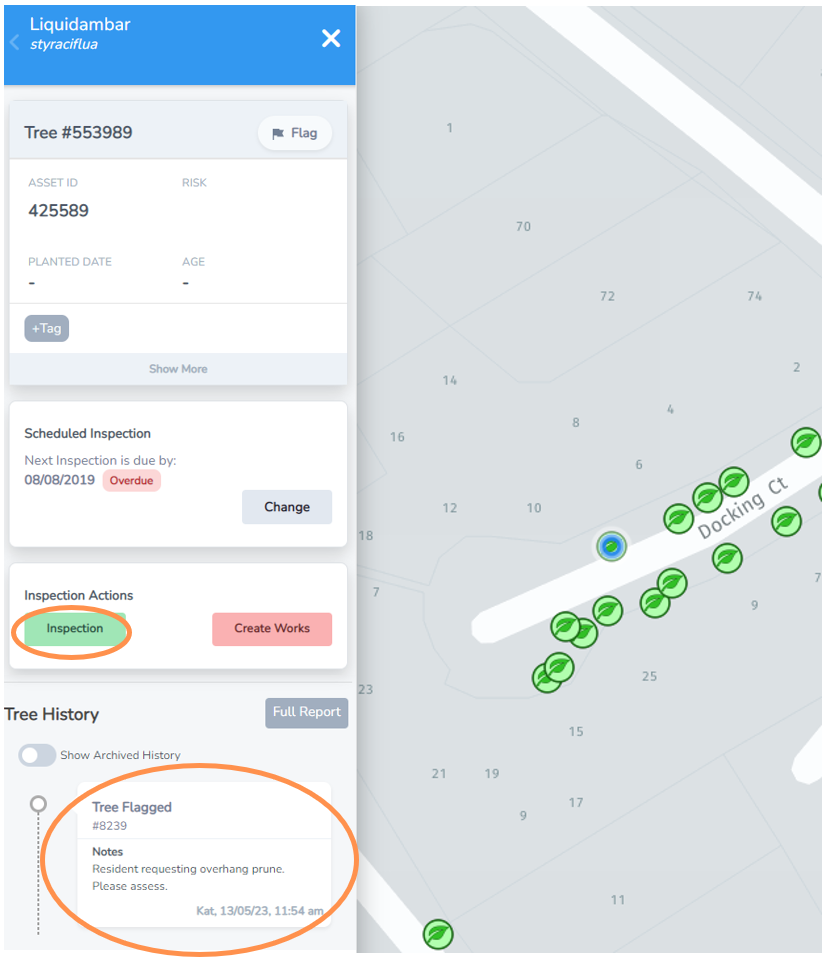
Completing Flagged Inspection
Now you should see something like the example below with the specific tree information on the left and the tree asset on the map pulsing in blue.
• For reference you can also see the Tree History and flagged information with any notes or photos taken, including the name and date that the tree was flagged.
• Select the green Inspection action button and you will flow through to the Inspection form process.
• Refer to the Inspect Tree user guide for steps on this process.
• Once in inspection is saved, the flagged tree will automatically be removed from the Flagged Inspections List.
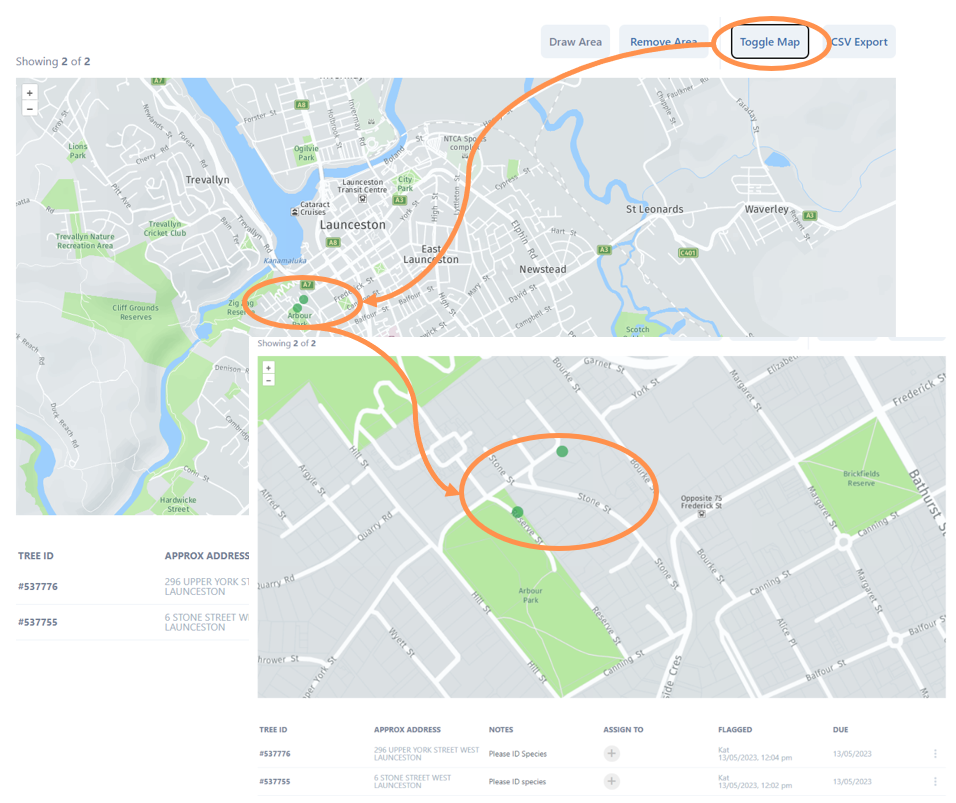
Inspections List Toggle Map
While you can simply use the list format, there is also an inbuilt map function on the Inspections List page.
• Select the Toggle Map button and an embedded map will appear showing any flagged inspection assets with green dots. The list is still visible just below the map
• With this map feature on, you can zoom and drag down to a closer view like the example below.
HINT: This is a handy way to visualise proximity and make fewer onsite trips for priority flagged inspections.
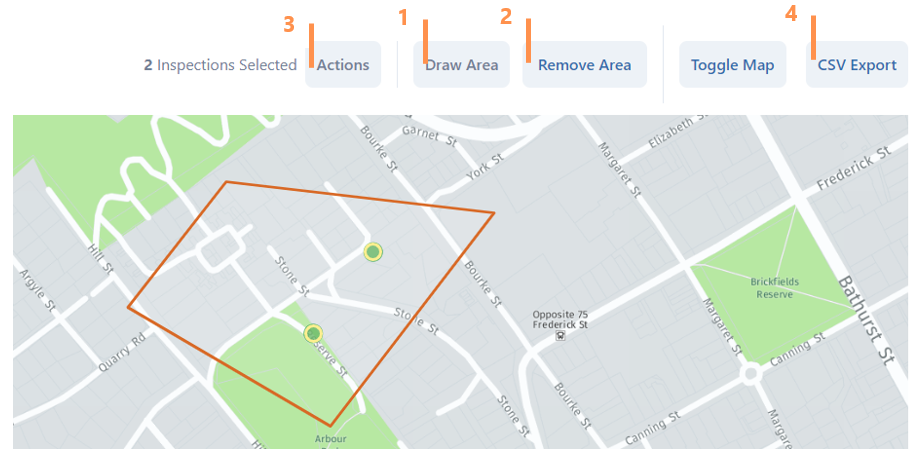
Draw Area
In Toggle Map view a new function is also available to draw a polygon area around a group of points. This way you can filter the list spatially rather than by categories.
1. Select the Draw Area button. Click on the map, drag to draw a line, click to mark a corner, drag to draw another line and so on. Double click when you are done and it will snap the polygon together. Any flagged inspection points within the polygon drawn area will automatically highlight with a yellow circle as selected.
2. At any point you can select Remove Area button to delete your polygon shape, so don’t be afraid to have a few attempts if you are new to this feature.
3. Once you have a completed drawn area, you can select the Actions button and bulk assign the selected inspections to a single staff member or contractor.
4. You can also select the CSV Export Button and have an excel list download of your grouped inspection list.