Reactive Works
Reactive Works are created from an Inspection or from a Customer Request (if integration is configured).
Complete Reactive Work
• Navigate to the tree asset on the Works Map view or from the Work Required List.
• Select the tree and the left menu will appear.
• The work task will appear at the top, with a unique Works ID number.
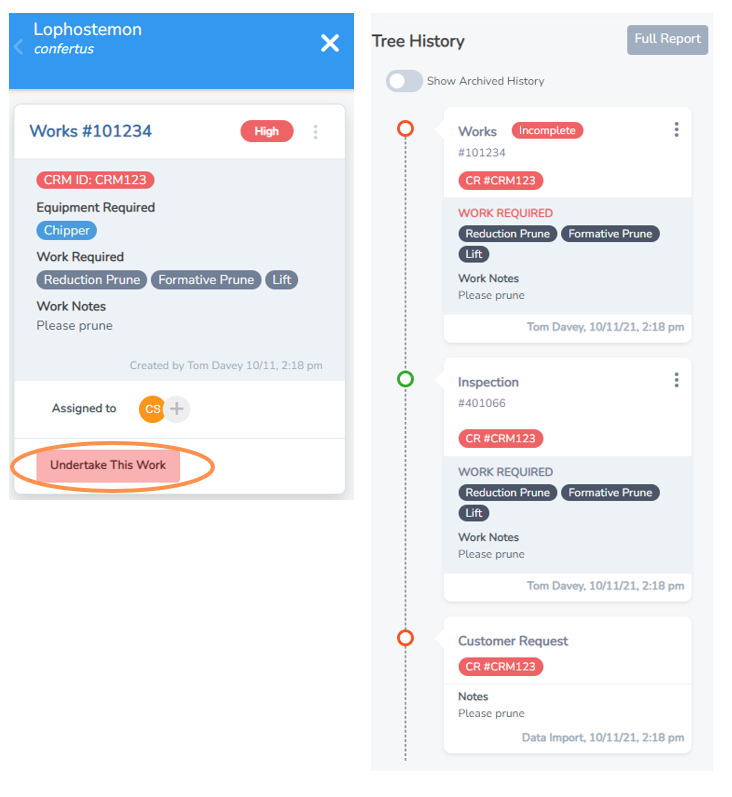
NOTE: At the bottom of the left menu you can view the Tree History and see when, who and how the work task was created as a handy reference.
• Under Work Actions, select the Undertake Proactive Work button.
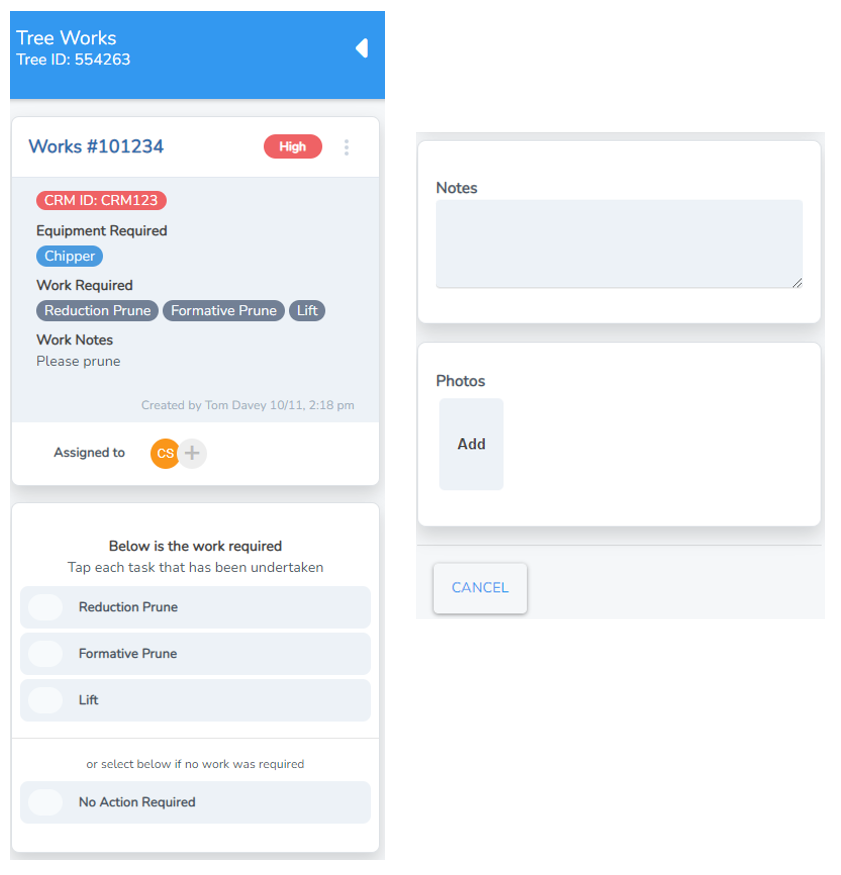
• You should now see the Tree Works Form, still with the details and work notes in easy view at the top.
• Select each task as you complete them.
• Include any notes if applicable.
• Click “Add” and you will be taken to a browse screen to select and import a photo from your computer or device.
HINT: Get in the habit of including a photo of completed works. It doesn’t take long and is time stamped evidence if the work is ever questioned.
• Select save. The work(s) will now be logged as completed and registered on the tree history.
In this example the save button is missing as the tasks have not yet been tapped. It will appear once at least one task has been marked at complete.
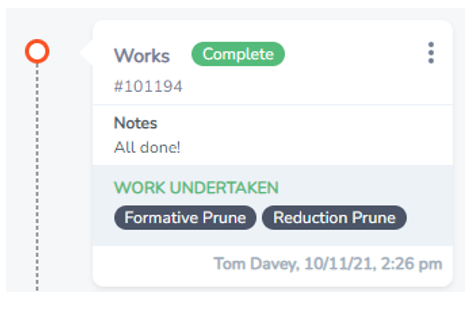
A completed works history looks something like this: